You'll find several effective kinesiology taping techniques for shoulder injuries, depending on your specific condition. For rotator cuff support, apply two 8-inch strips with 25-50% tension from mid-deltoid to scapula. Shoulder impingement relief requires three strips in specific patterns, including a Y-strip configuration across the upper trapezius. AC joint and deltoid support applications use additional patterns with varied tension levels. Proper technique and regular monitoring guarantee top recovery through these evidence-based approaches.
Understanding Kinesiology Tape and Its Benefits for Shoulders
Kinesiology tape, a flexible cotton strip with medical-grade adhesive, has revolutionized the treatment of shoulder injuries in both athletic and therapeutic settings. You'll find that this innovative tape works by gently lifting your skin, which improves blood circulation and reduces inflammation in your shoulder area.
The tape's unique elastic properties support your shoulder's range of motion while providing stability to injured muscles and joints. When you're dealing with conditions like rotator cuff injuries, shoulder impingement, or general muscle strain, kinesiology tape can help reduce your pain and accelerate healing. It's particularly effective because it allows you to maintain mobility while supporting your shoulder's natural movement patterns. The tape's water-resistant properties mean you can wear it for several days, even during showers or intense workouts.
Basic Shoulder Anatomy and Common Injuries
Your shoulder joint represents one of the body's most complex anatomical structures, consisting of three main bones: the humerus, scapula, and clavicle. These bones work together with muscles, tendons, and ligaments to provide a remarkable range of motion, but this mobility also makes your shoulder vulnerable to various injuries.
Common shoulder conditions you'll need to watch for include:
- Rotator cuff tears, which affect the muscles and tendons that stabilize your shoulder
- Impingement syndrome, where tendons become compressed and inflamed
- Frozen shoulder, characterized by stiffness and reduced range of motion
- Bursitis, involving inflammation of the fluid-filled sacs that cushion your joints
Understanding these basic anatomical components and potential injuries is essential when you're considering kinesiology taping as a therapeutic approach.
Rotator Cuff Support Taping Method
When dealing with rotator cuff injuries, proper taping technique becomes essential for supporting the affected muscles and promoting ideal healing conditions. You'll need to apply the tape in specific patterns that target the rotator cuff muscle group while allowing for natural movement.
| Step | Action |
|---|---|
| 1 | Clean and dry the shoulder area thoroughly |
| 2 | Cut two 8-inch strips of kinesiology tape |
| 3 | Apply first strip from mid-deltoid to scapula |
| 4 | Position second strip perpendicular to first |
Begin by anchoring the first strip with zero tension at the deltoid's middle portion. As you extend the tape toward the scapula, apply 25-50% tension across the injured area. You'll want to rub the tape vigorously after application to activate the adhesive and guarantee proper bonding to the skin.
Shoulder Impingement Relief Technique
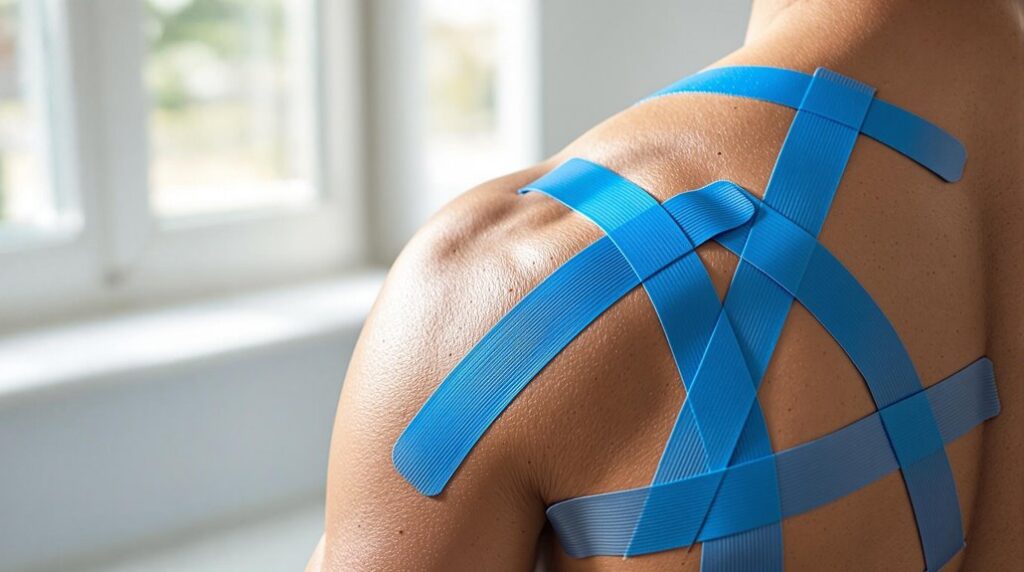
Three distinct tape strips form the foundation of an effective shoulder impingement relief technique, which targets the specific mechanics of shoulder movement while reducing painful compression. You'll need to apply the first strip from the front deltoid to the posterior deltoid, creating a mechanical lift that decompresses the subacromial space.
- Position the shoulder in slight flexion and internal rotation before applying the base strip
- Apply the second strip perpendicular to the first, starting at the anterior deltoid and moving toward the rotator cuff
- Use a Y-strip configuration across the upper trapezius to provide additional support
- Maintain 10-15% stretch tension when applying each strip to guarantee proper tissue decompression
The strips work together to create a dynamic support system that helps reduce pain and facilitate proper movement patterns during rehabilitation exercises. Additionally, understanding muscle tear recovery times can enhance the effectiveness of these techniques in your rehabilitation process.
AC Joint Stabilization Pattern
Since acromioclavicular (AC) joint injuries can greatly impact shoulder mobility and strength, proper taping techniques become essential for stabilization and healing support. You'll need to apply two anchoring strips: one across the AC joint and another along the anterior deltoid. Start with a Y-strip that extends from your upper trapezius, crosses over the AC joint, and continues down the anterior shoulder.
For additional support, you'll want to apply an I-strip perpendicular to the Y-strip, directly over the AC joint with 50-75% tension. This cross-pattern helps limit excessive movement while maintaining functional range of motion. When applying the tape, make certain your shoulder's positioned in a neutral stance to prevent overtightening, which could restrict necessary movement patterns during daily activities or rehabilitation exercises. Awareness of ankle injury signs can also enhance your overall injury prevention strategy.
Deltoid Muscle Support Application
The deltoid muscle's complex structure requires strategic taping techniques to provide optimal support and pain relief. You'll need to apply kinesiology tape in a way that supports all three heads of the deltoid while maintaining proper shoulder mobility. When applying the tape, you'll want to position your shoulder in slight flexion to guarantee ideal stretch and support.
- Start at the muscle's insertion point on the deltoid tuberosity, applying the first strip with 25% tension
- Create a fan pattern using three separate strips to cover anterior, middle, and posterior deltoid heads
- Anchor each strip at different points along the scapular spine and acromion process
- Maintain consistent tension throughout application while avoiding excessive stretch near endpoints
For best results, you'll need to keep the tape in place for 3-5 days, unless skin irritation develops or the tape begins to lose adhesion.
Postural Correction Taping for Shoulder Alignment
When addressing chronic shoulder misalignment, postural correction taping serves as a powerful tool to retrain muscle memory and promote proper positioning. You'll need to apply the tape in a way that creates gentle tension across your upper back and shoulders, encouraging your scapulae to maintain ideal alignment.
To achieve this, you'll start by anchoring the tape near your spine between your shoulder blades, then apply it laterally across each shoulder with about 25% stretch. The tape's elasticity will provide consistent proprioceptive feedback, reminding you to pull your shoulders back and down. You can enhance this effect by adding a second layer of tape in a crisscross pattern, which helps activate your middle trapezius and rhomboid muscles while supporting proper scapular positioning throughout daily activities. Sports massage can further complement this technique by improving muscle flexibility and enhancing movement efficiency.
Recovery and Maintenance Taping Protocols
Maintaining proper shoulder function after an injury requires consistent application of recovery-focused taping protocols. You'll need to apply specific taping patterns that support healing while allowing necessary movement for rehabilitation. These maintenance protocols should be adjusted as your recovery progresses, with tape tension gradually decreasing as strength returns.
- Apply fresh tape every 3-5 days to maintain ideal support and prevent skin irritation
- Combine recovery taping with prescribed physical therapy exercises for maximum benefit
- Monitor skin condition and adjust tape placement if you notice any discomfort or restriction
- Progress from supportive to dynamic taping techniques as your range of motion improves
When you're implementing these protocols, you'll want to document your progress and communicate any changes in pain or mobility to your healthcare provider, ensuring your recovery stays on track.
